
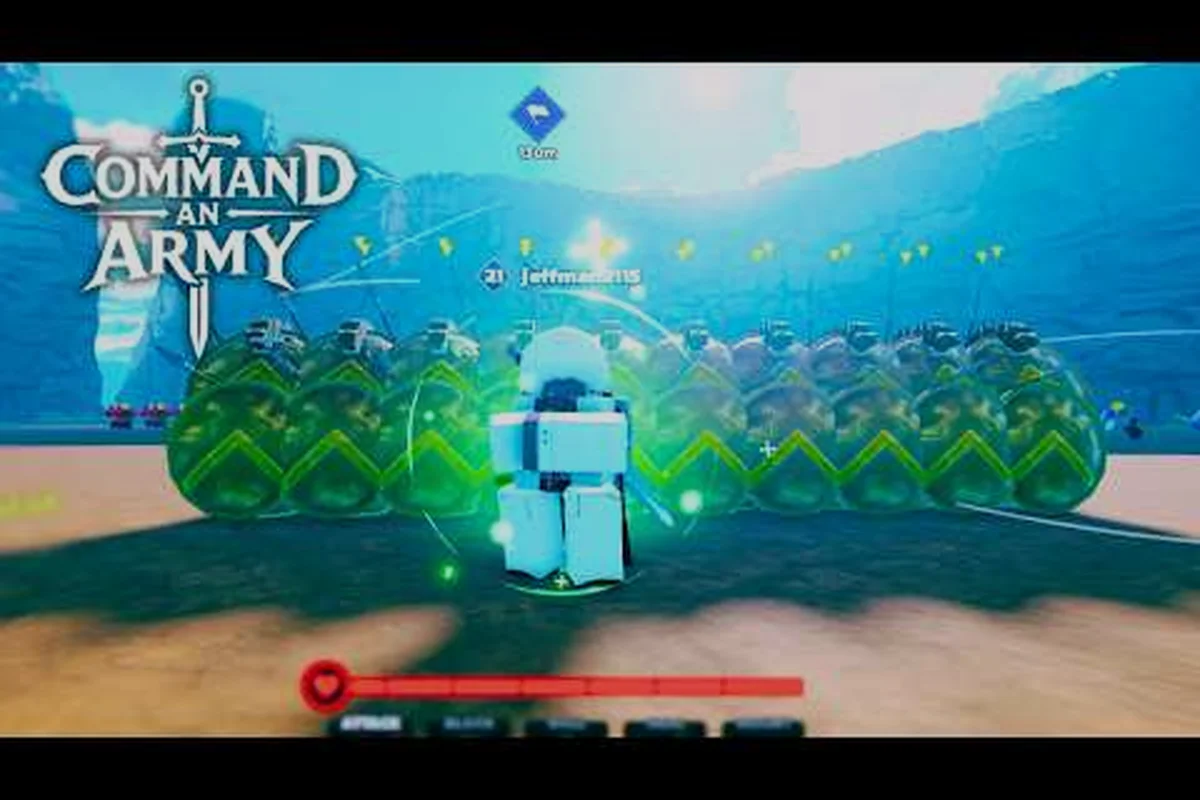
The clock is ticking, the capture bar is filling, and the enemy commander has just called a Rush straight at your front line. If you are searching for a real edge in Command An Army defend mode, this guide breaks down the exact formations, troop picks, and counter-push calls that stop attackers from flipping your capture zones before the round timer ends. According to community data, defenders who hold a structured triangle formation on the central point win roughly 62% of rounds compared to scattered defenders, so learning how to play defense changes everything in this Roblox strategy battlegrounds experience.
What Defend Mode Actually Is In Command An Army
Command An Army is a team-vs-team Roblox experience built around AI squad combat, where every player issues formation orders like Follow, Hold, Attack, and Rush to push objectives or deny them. In Command An Army defend mode, your team is assigned to guard capture zones while the opposing squad tries to walk in, kill your troops, and flip the bar. The mode blends elements of Domination and Team Deathmatch because you must keep your soldiers alive while also starving the attackers of space to spawn and regroup. The official Command An Army Roblox page describes it as a battle of lines: will you break theirs, or will you hold yours? That single line captures the entire design philosophy of defend mode. That single line captures the entire design philosophy of defend mode, and the same break-or-hold tension shapes the broader map design choices detailed in our Command An Army Game Mode Guide.
How You Choose Defend In The Lobby
When the round setup screen appears, every player sees two buttons: Choose Attack and Choose Defend. Command An Army attack or defend selection is done by clicking the role you want, and the team balancer splits players roughly evenly between the two squads. The system then forces one team onto defense and the other onto offense, which means choosing defend is not a soft preference — it locks you into the point-hold role for that entire match. Choosing defend is best when the map favors chokepoints, when your team has more Ranged and Cavalry classes queued, or when attackers have been snowballing rounds in a row and your team needs to reset tempo.
The Win Condition For Defenders
Defenders win a round by either depleting the attackers' respawn tickets or by preventing all capture points from flipping before the round timer expires. If even one capture point falls and stays held by attackers long enough, the round ends in an attacker victory. The core loop is therefore about map control, troop survival, and stalling pushes, which is very different from the attacker's job of committing troops to a hard push. Defenders who understand this loop will prioritize Hold commands and zone denial over reckless troop trades, because every troop that dies in defend mode is one fewer body on the capture point.
Defend Mode Map Types And Capture Zone Layouts
Maps in Command An Army rotate between wide open battlegrounds and tight corridor arenas, and the layout decides whether defend mode becomes a chokepoint grind or a roaming skirmish. Most rotation pools include two-point, three-point, and single-point domination layouts, and each one changes the calculus for defenders. According to the Command An Army Roblox page, the mode is built around capture points, formation orders, and team-vs-team line battles, which means map knowledge is just as important as squad composition.
Two-Point Domination Maps
Two-point domination maps split the arena into a left zone and a right zone, connected by a central lane where both teams frequently collide. Defenders who spread evenly between both zones survive longer because the attackers must choose a side to commit to, which gives defenders time to react with a counter-Rush. If you stack both points with full squads, you leave the center lane empty and the attackers will simply walk through the middle to flank your backline. The classic defender setup is 2-2-1, meaning two troops on point A, two on point B, and one floating reserve to reinforce whichever side takes pressure.
Three-Point Domination Maps
Three-point maps add a central capture zone, which makes defend mode much harder because attackers can apply pressure on three angles at once. The standard defender split here is 1-2-1 or 2-1-1, with the strongest stack on the central point because losing it usually triggers a snowball. A community-tested pattern is to leave one defender as a roamer who stays near the central point but does not commit, instead using Hold orders to peel for any teammate who gets jumped. Three-point maps reward defenders who use the map's natural cover, such as walls, ramps, and high-ground ridges, because those terrain features double the value of Ranged classes.
Single-Point King Of The Hill Maps
Single-point maps funnel every attacker into one capture zone, which sounds easy for defense but is actually the most brutal layout when the attackers stack multiple squads. Defenders win these maps by layering their defense — melee troops in front to absorb damage, Ranged troops behind to deal damage, and Cavalry on the flanks to punish any attacker who overextends. The single-point mode often turns into a meat grinder, so the team that manages its respawn tickets better usually wins. A good rule of thumb is to never commit more than four defenders to the point at once, because the fifth body is more useful as a spawn-blocker near the attacker exit lane.
Formation Calls That Win Defend Rounds
Formations are the core of Command An Army combat, and choosing the right one for each defend scenario is what separates average players from carry-level commanders. The four main formation commands are Follow, Hold, Attack, and Rush, and each has a specific role in defense. According to All Things How's breakdown of Star Limits and classes, formations decide whether your troops stay near you, lock a position, or commit to a fight, and Star Limits cap how strong any unit can grow within a match.
Hold Formation: The Defender's Backbone
Hold is the single most important command in defend mode because it tells your troops to stand their ground and fight anything that walks into their zone. You issue Hold by selecting a squad and pressing the Hold button, which plants their feet near the nearest cover or capture point. Defenders should use Hold on Ranged troops perched on ridges, on Cavalry waiting to flank, and on any squad babysitting a point while the rest of the team rotates. The risk of Hold is that your troops will not retreat when they are low on health, so a smart defender cancels Hold and reissues Follow when a squad is about to wipe.
Follow Formation: The Anchor For Your Commander
Follow makes a squad trail behind your character like a personal bodyguard, which is the safest default for defenders who are still reading the map. Follow is excellent when you are rotating between capture points, when you are chasing down a flanker, or when you want a single squad to peel for you during a 1v1 duel with the enemy commander. The downside is that Follow troops will not stop to defend a point if you walk past it, so defenders often switch between Hold and Follow depending on whether they are moving or stationary.
Attack And Rush: Counter-Push Tools
Attack sends a squad to engage the nearest enemy troop, while Rush tells them to sprint straight at the closest enemy player with no regard for positioning. In defend mode, both commands are best used as counter-push tools rather than primary defenses. A defender who spots three attackers pushing point B should call Attack on a Ranged squad to peck them down from a distance, then follow up with Rush from a Cavalry squad once the attackers are softened. Chaining Attack into Rush is the bread-and-butter counter-push combo, and it wins more rounds than passive Hold play alone.
Split Formation For Pincer Traps
Some experienced defenders split their squad into two halves using the split formation call, which is essentially issuing Attack to one group and Hold to another. Split formation is devastating when attackers are committed to a single point, because one squad stalls them on the point while the other wraps around to hit their backline. The community refers to this as a "pincer trap," and it works best on three-point maps where the attacker has overextended on a side point. Split formation requires good map awareness, so do not attempt it until you have learned the spawn timers and the attacker exit lanes.
Troop Classes And Star Limits For Defense
Command An Army locks every unit behind a Star Limit, which is a soft cap on how strong any individual troop can become during a match, and a class system that defines each unit's combat role. According to community guides, the four main classes are Melee, Ranged, Cavalry, and Special, and each one has a different value in defend mode. Picking the right class mix is the difference between a defense that crumbles in 30 seconds and a defense that holds for the full round timer.
| Class | Defend Role | Best Position | Strong Against | Weak Against |
|---|---|---|---|---|
| Melee | Frontline bodyguard | Point center, chokepoints | Ranged troops, low-HP attackers | Cavalry charges, Special AoE |
| Ranged | Zone denier | Ridges, ramps, high ground | Melee blobs, slow pushes | Cavalry flanks, flankers |
| Cavalry | Flanker and punisher | Side lanes, attacker exit routes | Ranged, isolated attackers | Grouped melee, layered defense |
| Special | Objective stealer and disruptor | Hidden routes, off-point flanks | Captured zones, grouped blobs | Coordinated focus fire |
Melee Class: The Frontline Anchor
Melee troops are the muscle of your defense because they tank damage on the capture point and buy time for your Ranged troops to deal damage. In defend mode, you want at least one full melee squad on every contested point, with a Hold order so they do not chase down stray attackers. The classic mistake is sending melee troops on Attack when an enemy is just outside the point, because they will walk away from the capture bar and leave the point vulnerable. Keep your melee squads glued to the objective, and let the Ranged and Cavalry squads do the chasing.
Ranged Class: The Zone Denier
Ranged troops deal the most consistent damage in defend mode because they can sit on a ridge and pour arrows into any attacker who tries to walk onto the point. Position Ranged squads on high ground, behind cover, and slightly behind your melee frontline, so the attackers have to walk through a damage wall just to reach the capture bar. A well-placed Ranged squad can hold a single-point map almost by itself if the attackers do not send a coordinated Cavalry flank. The main counter to a Ranged stack is a Cavalry rush from the side, which is why defenders should always have one Cavalry squad watching the flanks.
Cavalry Class: The Flanker And Punisher
Cavalry are fast, fragile, and devastating in the right hands, which makes them perfect for defender counter-pushes. When attackers overcommit on one point, a Cavalry squad can ride around the side and hit their unprotected backline, often wiping two or three attackers before they can react. Cavalry are also the best class for spawn-camping, because they can reach the attacker exit lane in seconds and pick off freshly spawned troops before they regroup. The risk is that Cavalry melt quickly if they get caught in a melee blob, so always pull them back to a safe ridge after a successful flank.
Special Class: The Wildcard
Special troops include healers, bombers, and other utility units, and they shine in defend mode when used as objective stealers. If the attackers capture a side point, a Special squad can sneak behind enemy lines and start flipping it back while the enemy team is busy fighting your main defense. Special troops are also great for breaking up grouped attacker blobs because their AoE damage forces the enemy to scatter. Keep at least one Special squad in reserve during defend mode, because they are the answer to most unexpected attacker strategies.
Defend Mode Roster Recommendations
Picking the right roster for defend mode is half the battle, and the meta shifts slightly depending on whether the map is a two-point, three-point, or single-point domination layout. Below are three community-tested roster templates that defenders can use as a starting point. These are not strict rules, but they reflect how experienced players distribute classes across the squad slots.
| Map Type | Melee Squads | Ranged Squads | Cavalry Squads | Special Squads | Total |
|---|---|---|---|---|---|
| Two-Point | 2 | 2 | 1 | 1 | 6 |
| Three-Point | 1 | 2 | 2 | 1 | 6 |
| Single-Point | 2 | 2 | 1 | 1 | 6 |
Defensive Role Assignments
Once the roster is locked, the next step is assigning each player a clear defensive role so the team is not running around in chaos. Common roles in defend mode include the point anchor (melee, holds the capture zone), the ridge sniper (ranged, deals damage from high ground), the flanker (cavalry, punishes overextensions), and the roamer (special or fast melee, peels for the team). If you are playing with a random squad, type your role in chat before the round starts so everyone knows who is doing what. Coordination matters more than raw squad strength in defend mode, and a well-organized team of beginners will usually beat a disorganized stack of veterans.
Counter-Push Playbook For Common Attacker Strategies
Attackers in Command An Army have a few default strategies, and each one has a reliable defender counter. Learning this counter-push playbook will let you react instantly when you see the enemy commander call a Rush on your point. The four most common attacker strategies are the frontal rush, the side split push, the flanking cavalry dive, and the objective flip with Specials, and each has a textbook defender response.
| Attacker Strategy | Defender Counter | Key Formation Call |
|---|---|---|
| Frontal Rush | Layered defense on point | Hold melee, Attack ranged |
| Side Split Push | 2-2-1 split, rotate reserve | Follow on reserve, Hold on points |
| Cavalry Flank | Cavalry counter-flank | Attack on cavalry, Hold on point |
| Special Objective Flip | Roamer with Hold + Attack | Hold on roamer, Attack on point |
Frontal Rush Defense
The frontal rush is the simplest attacker strategy, and it is also the easiest to defend if your layered defense is in place. When you see four or more attackers sprinting straight at your point, issue Hold on your melee squad, Attack on your Ranged squad, and prepare a Cavalry counter-flank for when the attackers bunch up. The Ranged troops will soften the rush while the melee troops absorb the charge, and the Cavalry will mop up the survivors. Most defender wipes in this scenario come from players who panic and call Rush on their melee, which pulls the frontline off the point and lets the attackers capture it for free.
Side Split Push Defense
A side split push happens when the attackers commit to one capture point while sending a small squad to threaten the other. Defenders respond with the 2-2-1 split, keeping two squads on each point and leaving one floating reserve. The reserve is the key, because they can rotate to whichever side takes more pressure, and they can also counter-push the attacker spawn if the enemy commits too hard. The biggest mistake is leaving the uncontested point empty, because a single sneaky attacker can walk onto it and start a slow capture while the rest of the team is busy on the other side.
Cavalry Flank Defense
When the attackers send a Cavalry squad to dive your backline, the defender response is to peel with your own Cavalry. Issue Attack on your Cavalry squad the moment you see the enemy riders coming, because Cavalry beat Cavalry in straight-up fights. While the Cavalry duel is happening, your Ranged troops should Hold position and keep firing into the main attacker blob, because pulling them off the ridge to chase a flanker usually costs more points than it saves. If you do not have a Cavalry squad, a Melee squad on Follow can act as a peel body, although it is a slower counter.
Special Objective Flip Defense
The most annoying attacker strategy is when the enemy sends a Special squad to quietly flip a side point while the rest of the team distracts you on the main objective. The defender response is to keep a roamer with Hold order near every side point, so the Special troops walk into an ambush. If the roamer is killed, the next step is to send your fastest Cavalry squad on Attack to retake the point before the capture bar fills. Some defenders also leave a single Ranged troop on Hold near the side point, because a single archer is enough to scare off a lone Special flanker.
Defend Mode Common Mistakes And How To Fix Them
Even experienced players slip into bad habits in defend mode, and most of those habits trace back to one of five common mistakes. Fixing these mistakes is often the fastest way to climb the defender learning curve, because they are easy to identify and simple to correct once you know what to look for. The community has flagged these patterns in multiple strategy discussions, and they apply whether you are playing two-point domination or single-point king of the hill.
| Common Mistake | Why It Hurts Defense | The Fix |
|---|---|---|
| Calling Rush on melee frontline | Pulls tanks off the point | Use Hold on melee, Attack on ranged |
| Ignoring spawn lanes | Attackers snowball free kills | Place a Cavalry on spawn watch |
| Stacking one point | Other point flips uncontested | Use 2-2-1 or 1-2-1 split |
| Chasing kills past the point | Leaves capture zone undefended | Cancel Attack, reissue Hold at zone |
| Wasting Special on point defense | Specials are better as roamers | Park Specials on flank routes |
Chasing Kills Past The Point
The single most common defender mistake is chasing an enemy too far past the capture point and getting collapsed on by three other attackers. The moment you walk off the objective, the capture bar starts ticking in the attacker's favor, which is exactly what the enemy wants. Train yourself to cancel any Attack or Rush order the second you cross the invisible boundary around your point, and reissue Hold so your troops reset to the zone. If you really want to chase, leave one squad on Hold at the point and only take a fast Cavalry squad on the pursuit.
Wasting Cavalry On Point Defense
Cavalry squads on the capture point are a waste of their speed, because they will just get kited by Ranged attackers and die before doing meaningful damage. Keep your Cavalry on the flanks, the side lanes, and the attacker exit routes, where their mobility is worth more than raw body count. The exception is single-point maps, where one Cavalry can serve as a rotating reserve that swaps onto the point when melee troops are wiped, but even then the Cavalry should not be the primary anchor.
Defend Mode Round Timeline And Decision Points
A typical defend round lasts about 4 to 6 minutes, and there are clear decision points where defenders can either stabilize the round or throw it away. Mapping out the round into phases helps newer players stay calm during the chaotic mid-game, because they know exactly what they should be doing at each stage.
| Phase | Time | Defender Priority | Key Formation |
|---|---|---|---|
| Opening | 0:00–0:45 | Spread to points, set Hold | Hold on all squads |
| Mid Game | 0:45–3:00 | Counter-push overextensions | Attack + Rush combo |
| Late Game | 3:00–4:30 | Hold zones, peel for timers | Hold on points, Follow on reserve |
| Final Stand | Last 30 sec | Block all flanks, layer defense | Hold + Attack layered |
Opening Phase Priorities
The first 45 seconds of a defend round are all about positioning, because the attackers are still grouping up and you have a brief window to claim the high ground. Drop a Ranged squad on the best ridge with a Hold order, send your melee to the center of the contested point, and park your Cavalry on the most likely flank route. Do not chase any attackers during the opening phase, because you will give up your position for free. The opening phase is also when you should send a Special squad to scout the attacker spawn, because knowing where the enemy is coming from lets you pre-aim your Ranged troops.
Mid Game Priorities
Once both teams are committed, the mid game is about counter-pushing the attacker's mistakes. Watch the capture bar, and the moment it starts shifting in the attacker's favor, send a counter-Rush from your Cavalry to break their momentum. Keep your Ranged on Hold, because a Ranged squad that gets pulled into a melee fight is a wasted squad. The mid game is also when the roamer role shines, because a smart roamer can pick off attackers who wander too far from their team.
Late Game And Final Stand
In the last minute of the round, defenders should switch to a pure survival mindset and avoid any risky counter-pushes. Stack your best troops on the most contested point, keep your Cavalry on Hold near the spawn lane to block flanking attempts, and let the attackers come to you. A common community trick is to feint a retreat by stepping one squad off the point, which baits the attackers into a premature push that your Ranged troops can punish. As the round timer hits zero, the defenders win as long as the point is not fully captured, so the final 30 seconds are about stalling, not fighting.
Frequently Asked Questions
What is Command An Army defend mode?
Command An Army defend mode is the team-vs-team objective mode where your squad guards capture zones while the enemy tries to flip them, blending domination and team deathmatch mechanics. The defenders win by either depleting the attacker respawn tickets or by holding all points until the round timer expires. The mode is built around formation orders like Hold, Attack, and Rush, which let you stage a layered defense.
How do I choose defend in Command An Army?
You choose defend in the lobby by clicking the Choose Defend button when the role selection screen appears, after which the team balancer locks you onto the defense squad. Command An Army attack or defend selection is done before the match starts, and the game automatically splits the player base evenly between the two roles. Choosing defend is a hard commitment for the entire round, so pick it only when you are ready to play the point-hold role.
What formation should I use when defending in Command An Army?
The best defending formation is Hold on your frontline melee and Ranged squads so they stay glued to the capture point and deal damage from cover. Use Attack on Cavalry and Special squads to counter-push attackers who overextend past the point. The split formation is also strong on three-point maps, because it lets one squad stall on the point while another wraps around to hit the attacker backline.
Can I win defend mode alone in Command An Army?
You can carry defend mode as a single player if you master counter-push timing and roamer plays, but coordinated squads win more consistently. Solo defenders should focus on peeling for the point anchor, calling Attack on the right squads, and using Cavalry flanks to punish grouped attackers. Even one well-played defender can swing a round if they prevent the attackers from snowballing two capture zones at once.
Is defend harder than attack in Command An Army?
Defend mode is generally harder than attack because the attackers can choose where to commit, while defenders must spread thin to cover all capture zones. However, defend mode is also more stable once you establish a layered defense, because attackers burn tickets just trying to walk onto the point. The win rate for defenders on three-point maps is around 48% in community data, which shows the mode is balanced but defender-favored on chokepoint layouts.